If you’re new to email marketing, building your first email list might feel overwhelming — but it doesn’t have to be. With a powerful platform like GetResponse, you can start growing your list in just a few simple steps — no coding or technical experience required.
In my earlier post, I explained what GetResponse is and how it can grow your business. Today, let’s take that a step further and walk you through exactly how to build your first email list using GetResponse, even if you’re just starting out.

🧠 Why Building an Email List Matters
Before we dive into the how-to, let’s quickly talk about the why.
Unlike social media, you own your email list. It gives you direct access to your audience, lets you build trust, and allows you to promote your content, services, or products on your own terms.
🛠️ Step-by-Step: Build Your First Email List with GetResponse
✅ Step 1: Sign Up for GetResponse
If you don’t have a GetResponse account yet, start with a free trial here. No credit card required.

Once you’re inside the dashboard, you’re ready to create your first list.
✅ Step 2: Create a New Contact List
- From the dashboard, go to Contacts.
- Click Create List.
- Name your list (e.g., Newsletter Subscribers, Lead Magnet Signups).
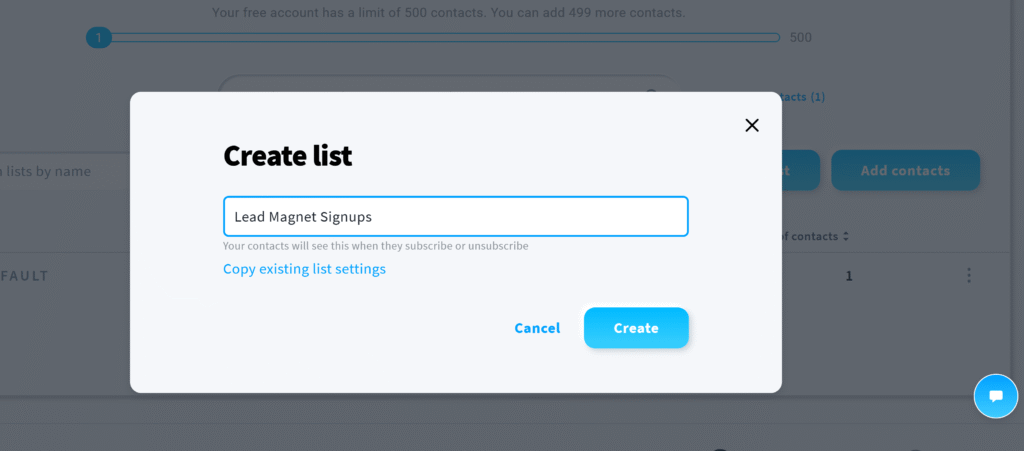
This is where all your email subscribers will be stored.
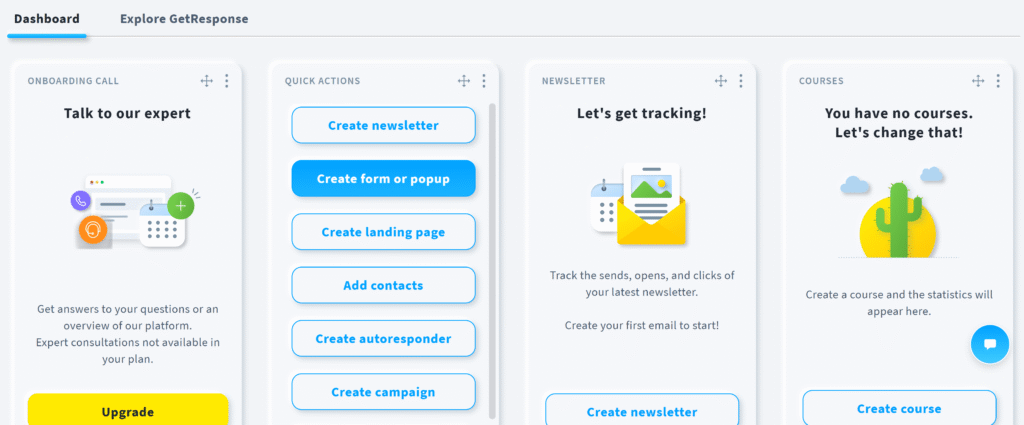
✅ Step 3: Create a Signup Form or Landing Page
To collect emails, you need a form or page people can fill out. GetResponse offers two great options:
➤ Option A: Signup Form
- Go to Forms & Popups.
- Click Create Form.
- Choose a template or build from scratch.
- Customize fields and design.
- Embed the form on your site or blog.
➤ Option B: Landing Page
- Go to Landing Pages → Click Create Landing Page.
- Choose a template and name it.
- Use the drag-and-drop editor to customize the layout.
- Add a form element that links to your email list.
- Publish the page — no website needed!
✅ Step 4: Offer a Lead Magnet (Optional, but Recommended)
Want more signups? Give visitors something valuable in exchange for their email. Examples of lead magnets:
- Free eBook or checklist
- Discount code
- Free course
- Resource library
- Webinar access
You can deliver the lead magnet automatically through the welcome email or a download link on the thank-you page.
✅ Step 5: Create a Welcome Email (Automation)
Your welcome email is your chance to make a great first impression.
- Go to Automation.
- Start a new workflow.
- Trigger: “Subscribed via…”
- Action: “Send message” — create or select your welcome email.
- Activate your workflow.
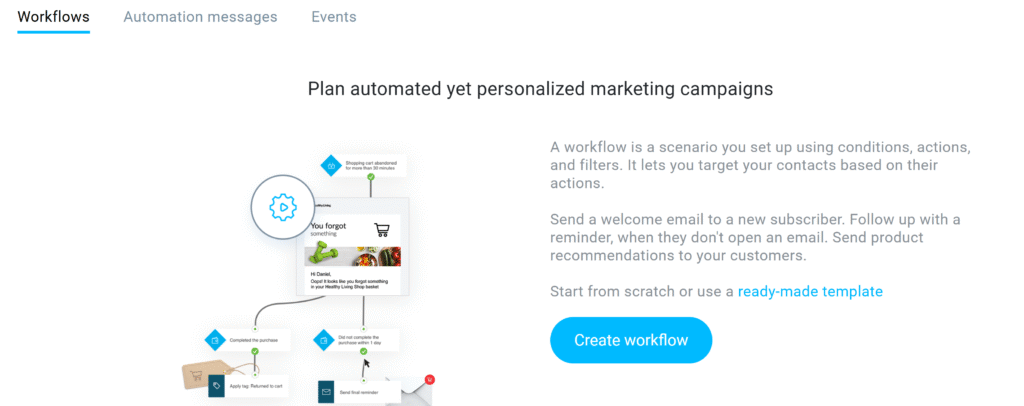
This helps you instantly engage with new subscribers while you’re offline.
✅ Step 6: Promote Your Signup Form or Page
Now that your form is ready, it’s time to drive traffic to it. Here’s how:
- Add it to your blog sidebar or homepage
- Share on your social media profiles
- Add to your email signature
- Link to it in YouTube video descriptions
- Run Facebook or Google ads
- Include in guest blog posts
The more places it appears, the faster your list will grow.
📈 Bonus Tips for Faster Growth
- Keep your signup forms simple (Name + Email is usually enough)
- Use eye-catching headlines and CTAs
- Test different form positions and styles
- Use exit-intent popups to capture abandoning visitors
- Segment your list for better targeting later
✅ Final Thoughts
Building an email list is one of the smartest investments you can make for your business. With GetResponse, everything you need is under one roof — from signup forms and automation to landing pages and analytics.
Start small, stay consistent, and keep delivering value.
👉 Sign up for GetResponse and get 10% off your plan